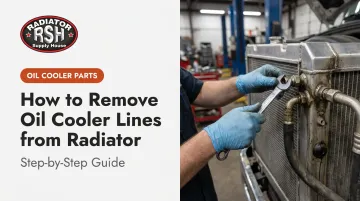
Removing these lines looks straightforward. It isn't always. Results depend heavily on fitting type (quick-connect versus threaded), how old and corroded the equipment is, and whether oil has already started mixing with coolant. Skip a step or grab the wrong wrench, and you risk spilled fluid, a damaged line end, or a cracked radiator tank that turns a simple job into an expensive one.
This guide covers what you need before starting, the exact removal steps, when this job actually makes sense, common mistakes, and how to troubleshoot problems mid-job.
Key Takeaways
- Remove oil cooler lines only from a cool, depressurized system, never a hot one.
- Fitting type (quick-connect, threaded, or compression) determines your tools and technique.
- Position drain pans and catch fluids before disconnecting anything.
- Corroded fittings on older equipment need penetrating oil and patience, not force.
- Cracks or oil-coolant mixing at the cooler tank signal the radiator needs replacing.
What You Need Before Removing Oil Cooler Lines from a Radiator
Preparation determines how clean and safe this job goes. Most damaged fittings, spilled fluids, and cracked radiator tanks trace back to one thing: someone skipped prep and dove straight into removal.
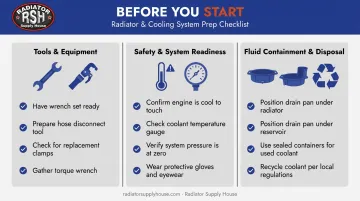
Tools and Equipment
Gather these before you touch a single fitting:
- Oil cooler line disconnect tool set (snap-ring style, for quick-connect fittings)
- Flare-nut wrench set for threaded fittings
- Two drain pans minimum: one for oil, one for coolant
- Shop rags
- Penetrating oil (PB B'laster or similar)
- Safety gloves and glasses
Flare-nut wrenches matter more than most people realize. An open-end wrench grips only two flat surfaces of a fitting; a flare-nut wrench wraps around nearly the entire hex, spreading load more evenly. On corroded line nuts common to older commercial trucks and heavy equipment, that difference often decides whether the nut turns cleanly or rounds off.
Safety and System Readiness
Hot coolant under pressure can cause serious burns if a fitting releases unexpectedly, so confirm the system is safe before disconnecting anything.
- Confirm the engine has been off for at least 2–3 hours with the cooling system fully depressurized
- Loosen the radiator cap first to bleed off residual pressure before disconnecting anything downstream
- Check whether a coolant drain is needed based on where the cooler ports sit relative to the coolant fill line. Ports below that line will spill on disconnect, regardless of engine temperature.
Fluid Containment and Disposal
Both oil and coolant will be present during this job. That means two separate drain pans, not one shared container, since mixing them makes proper disposal harder and can mask signs of internal cooler failure. For commercial fleet operators, used fluids must be disposed of according to local environmental regulations, and mixed oil-coolant waste often falls under stricter handling rules than either fluid alone.
How to Remove Oil Cooler Lines from a Radiator: Step-by-Step
Step 1: Let the Engine Cool and Relieve System Pressure
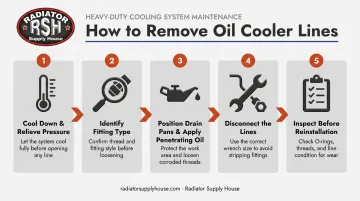
Verify the vehicle or machine has sat idle for at least 2–3 hours. Touch the upper radiator hose and the tank itself; both should be cool, not just "not hot." Then loosen the radiator cap without removing it fully, let any residual pressure hiss out, and re-tighten it. This depressurizes the system without exposing it to air and debris.
On heavy equipment with pressurized hydraulic oil cooler circuits, check the OEM service manual first. Some machines require additional pressure-relief steps beyond the radiator cap.
Step 2: Identify the Fitting Type
Clean the connection area with a rag, then look closely:
- Quick-connect fittings have a visible retaining clip or collar you press or pull to release.
- Threaded fittings use a hex nut that unscrews with a wrench.
- Compression fittings rely on a ferrule-and-nut assembly.
Misidentifying the fitting type and using the wrong removal method is the single most common cause of damaged line ends and cracked cooler ports. Take the extra thirty seconds to confirm before you touch a tool to it.
Step 3: Position Drain Pans and Apply Penetrating Oil
Slide a drain pan under each connection point before loosening anything. Fluid drains the moment a fitting breaks free, and you won't have time to grab a pan afterward.
If fittings show surface rust or haven't been disturbed in years (common on older trucks and equipment), apply penetrating oil to the threads or collar and let it soak 15 to 30 minutes before attempting removal. Rushing this step is how threaded nuts end up rounded.
Step 4: Disconnect the Oil Cooler Lines
For quick-connect fittings: Insert the correctly sized disconnect tool into the collar to compress the retaining tabs, then pull the line straight out with steady pressure. Twisting or jerking can snap the plastic retaining clip inside the radiator port, a cheap part that's annoying to replace once it's broken inside the fitting.
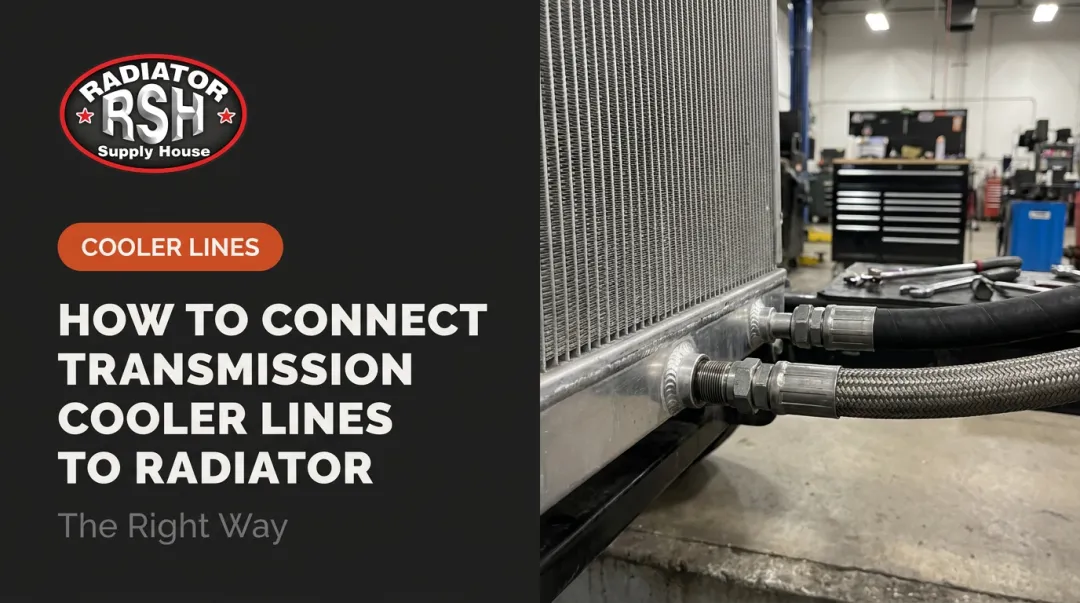
For threaded fittings: Use a flare-nut wrench on the line nut and a backup wrench on the fitting body at the radiator. This prevents the port itself from spinning or cracking while you turn the nut counter-clockwise. Catch fluid immediately as it releases.
Once free, cap or plug both the open line end and the radiator port. Clean rubber caps work best; shop rags are an acceptable stopgap. Leaving either end open invites debris into the system while it's exposed.
Step 5: Inspect Before Reinstallation
With the lines off, check the cooler ports on the radiator for cracks, corrosion, or milky residue, a telltale sign of oil and coolant mixing internally. Inspect the removed lines too: kinks, cracks, swollen hose sections, or corroded fittings mean that line gets replaced, not reinstalled.
If the radiator's internal oil cooler tank is damaged, the entire radiator typically needs replacing rather than just the line. Radiator Supply House stocks OEM-equivalent replacement radiators and standalone oil coolers for over 300 manufacturers, including heavy equipment brands like Caterpillar, Komatsu, John Deere, and Freightliner.
Some models sell the oil cooler integrated into the radiator assembly; others sell it as a separate component. Confirm which configuration your equipment uses before ordering.
When Should You Remove Oil Cooler Lines from a Radiator?
Not every cooling issue calls for pulling these lines. It's warranted when you're facing:
- A damaged or leaking radiator that needs replacement
- Suspected internal oil cooler failure (oil showing up in coolant, or vice versa)
- A cracked or corroded line fitting
- Routine replacement of aged rubber-section lines
- A full cooling system flush requiring complete access
It's not the right first move in every situation. Skip pulling the lines for:
- A minor external coolant leak unrelated to the cooler ports
- General overheating with no identified cause
- Lines showing no visible wear when the cooler hasn't been pressure-tested yet
Pulling lines without a clear diagnosis just adds a reassembly step to a problem you haven't actually solved.
Beyond these general guidelines, one brand-specific quirk deserves attention: some 2020-and-newer Freightliner/Western Star 108SD models have documented issues with their OEM internal transmission oil cooler configuration. If you're working on one of these and planning a radiator swap, confirm compatibility before assuming the original internal cooler setup should be retained.
Common Mistakes to Avoid When Removing Oil Cooler Lines
Even experienced techs run into trouble here. Watch for these four recurring errors that cause most of the damage during removal:
- Skipping the cool-down step. Working on a warm system risks scalding coolant spray and makes fitting condition harder to judge.
- Using the wrong tools. Open-end wrenches on threaded nuts and brute force on quick-connect collars round off nuts and snap retaining clips.
- Forgetting the backup wrench. Turning a line nut without countering the port fitting can crack the radiator tank.
- Leaving ports open. Uncapped radiator ports and line ends invite debris, insects, and moisture into the cooling and oil circuits within minutes.
Troubleshooting Problems During Oil Cooler Line Removal
Even with the right tools and prep, things go wrong, especially on older vehicles, high-hour equipment, or lines that haven't been serviced in years.
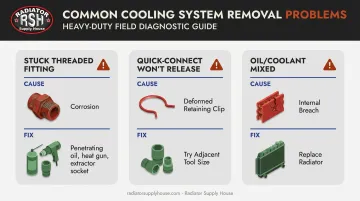
Stuck or Seized Threaded Fittings
Likely cause: Thread corrosion, often from dissimilar metals like a steel line nut threaded into an aluminum radiator tank. Equipment operating in wet, coastal, or road-salt environments faces this more often. Road deicers like calcium chloride and magnesium chloride accelerate corrosion on heavy trucks, according to Commercial Carrier Journal's reporting on truck corrosion.
What to try: Reapply penetrating oil and give it another 30–60 minutes. A heat gun applied carefully (never an open flame near oil lines) can help expand the fitting slightly. If it still won't budge, switch to a line nut extractor socket rather than continuing to force it. Continued force will crack the radiator port before that nut rounds any further.
Quick-Connect Fitting Won't Release
Likely cause: A corroded or deformed retaining clip inside the fitting, or a disconnect tool that doesn't match the fitting's inner diameter.
What to try: Common disconnect tool sizes run 5/16", 3/8", and 1/2"; try the next size up or down before assuming the fitting is bad. If the collar looks visibly deformed, replace the fitting rather than forcing the connection apart.
Oil and Coolant Mixed in the Drain Pan
Likely cause: A breach in the internal oil cooler means oil is crossing into the coolant circuit, or vice versa. This is a serious mechanical failure, not a cosmetic issue.
What to do: Don't reinstall that radiator. Allison Transmission's own technical bulletin states that transmission fluid containing more than 0.2% water by volume, or any trace of glycol, requires complete disassembly, cleaning, seal replacement, and torque converter replacement on affected units, according to Allison's official service bulletin. This isn't a job that ends with a fluid top-off; it affects the whole drivetrain, not just the radiator.
Frequently Asked Questions
How long does it take to change oil cooler lines?
On a light truck with accessible fittings, an experienced mechanic can finish in 1–2 hours. On heavy equipment or older vehicles with seized fittings, budget 3–4 hours or more once you factor in penetrating oil soak time and any flushing.
Does coolant run through oil cooler lines?
No. The lines themselves carry transmission or engine oil. The oil cooler sits inside the radiator tank surrounded by coolant, which is exactly why an internal breach causes oil and coolant to mix.
What tools do I need to remove oil cooler lines from a radiator?
You'll need a disconnect tool set for quick-connect fittings, flare-nut wrenches for threaded fittings, two drain pans, penetrating oil, and basic hand tools. The exact tools depend on which fitting type you're working with.
Can I drive with a leaking oil cooler line?
No. A leaking line causes ongoing oil loss, can let oil enter the coolant system and damage the transmission or engine, and creates a fire risk. Take the vehicle or equipment out of service immediately.
How do I know if my oil cooler lines need to be replaced?
Watch for visible oil leaks at fittings, milky or discolored coolant, and sludge in the transmission fluid. Also check for kinked or cracked rubber sections and corroded fittings that no longer seal properly. Any one of these is a replacement signal.
Do I need to drain the coolant before removing oil cooler lines?
It depends on port location. If the cooler ports sit below the coolant fill line, drain partially first to avoid a mess. If they sit above it, draining may not be necessary, but keep drain pans positioned either way.