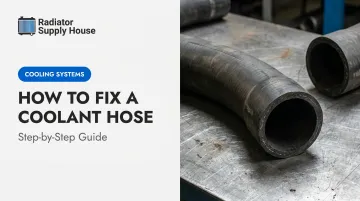
Cooling-system failures account for nearly one-quarter of preventable commercial-vehicle breakdowns, according to Fleet Maintenance industry analysis. Most of those failures don't come without warning — the problem is knowing what to look for before things go sideways.
This guide covers how to identify coolant hose problems, perform a proper step-by-step fix, decide between repair and replacement, and avoid repeat failures — whether you're maintaining a pickup truck or managing a heavy equipment fleet.
Key Takeaways
- Heat, pressure, and chemical exposure degrade coolant hoses — watch for warning signs before a full failure occurs
- Temporary roadside repairs (tape, repair kits) can get you moving, but are never a finished fix
- Proper repair means draining coolant, removing the damaged hose, installing the correct replacement, and testing for leaks
- On heavy equipment, replacement beats patching every time — downtime costs far more than a new hose
- Replace any hose showing cracking, swelling, or softness — don't wait for an active leak
Common Coolant Hose Problems and Why They Happen
Most coolant hose failures follow predictable patterns. Understanding the problem type makes the fix faster and prevents the same failure from repeating in six months.
Leaking or Dripping Coolant
Symptoms:
- Coolant puddles under the vehicle or equipment
- Sweet smell near the engine bay
- Low coolant warning light triggered
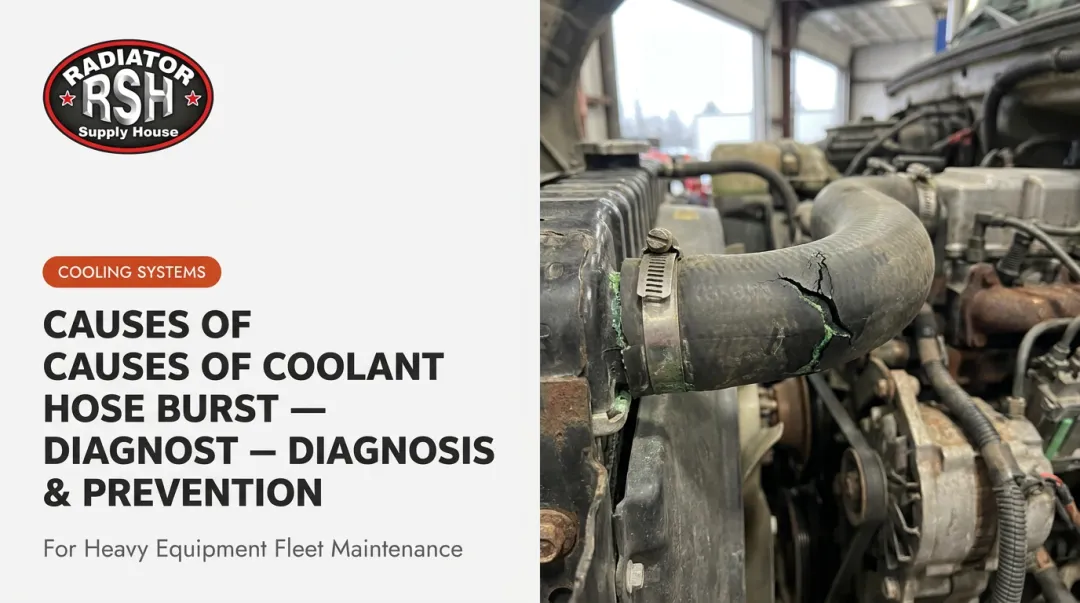
- White residue along the hose surface
Likely cause: Pinhole cracks from heat cycling, loose or corroded clamps, or hose hardening at connection points. High-hour equipment is especially susceptible, as repeated thermal cycling stresses the rubber over time.
Hose Collapse or Kinking
Symptoms:
- Sudden overheating under load
- Reduced coolant flow
- Temperature spiking during idle or operation
Likely cause: Internal hose reinforcement breaking down with age, vacuum created by a failing water pump, or incorrect hose routing from a previous repair. A collapsed hose restricts flow just as effectively as a blocked radiator.
Swelling, Bulging, or Soft Spots
Symptoms:
- A section of the hose appears ballooned or unusually soft to the touch when cold
Likely cause: Internal deterioration from oil contamination or electrochemical degradation (ECD). According to SAE and Gates technical data, ECD attacks the hose tube from the inside — dissimilar metals in the cooling circuit create an electrical potential that degrades EPDM rubber near the hose ends, often before the outer surface shows any visible damage.
ECD is particularly common in heavy-duty diesel engines and is one reason why hoses can fail internally while still looking fine outside.
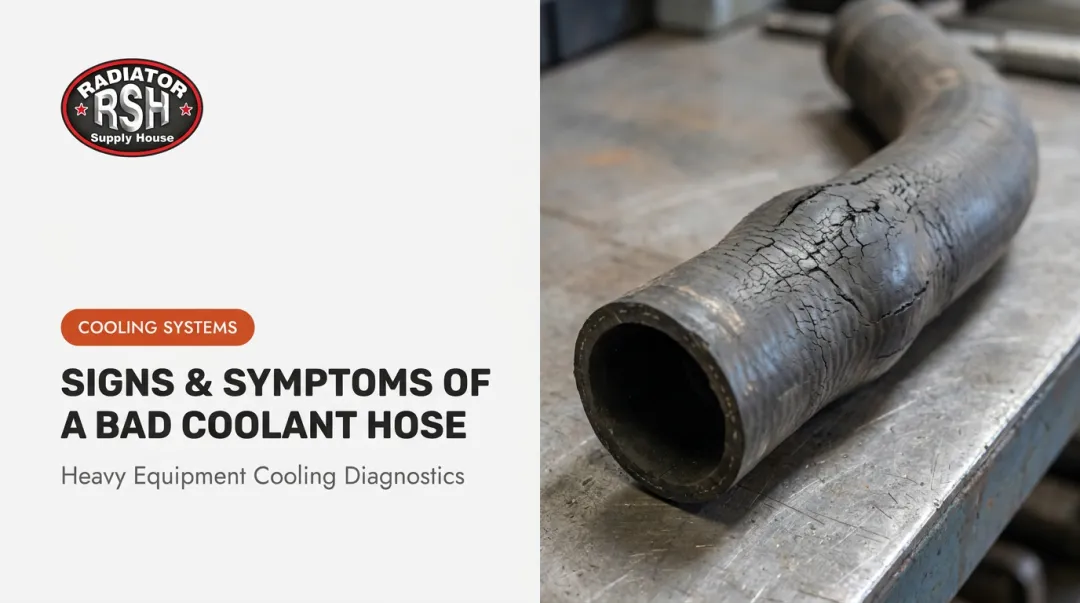
Hardening and Cracking
Symptoms:
- Hose feels stiff or brittle
- Surface cracking visible near clamp ends
- Hose doesn't flex when squeezed cold — it cracks
Likely cause: Extended service life, extreme heat exposure, or non-compatible coolant types accelerating rubber degradation. Gates recommends replacing coolant hoses every four years as a general service interval, though your equipment manual should always take precedence.
How to Fix a Coolant Hose: Step-by-Step
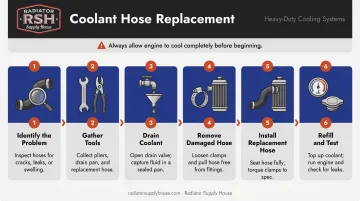
Before anything else: Let the engine cool completely. A Cummins operation manual warns explicitly — never remove a pressure cap until coolant temperature is below 50°C (120°F) and system pressure is fully relieved. Hot coolant or steam can cause severe burns.
Step 1: Identify the Exact Problem
Visually inspect the full length of the hose:
- Check for cracks, swelling, soft spots, or wetness around clamp areas
- Squeeze the hose when cold to feel for brittleness or abnormal softness
- Note where the failure is — at a clamp junction, mid-hose, or near a fitting
Location matters. A failure at the clamp end may only need a clamp replacement. A mid-hose crack or swollen section means the hose itself needs to go.
Step 2: Gather Tools and Materials
You'll need:
- Replacement hose (vehicle- or equipment-specific, not universal)
- Hose clamp pliers or flathead screwdriver
- Catch pan and funnel
- Fresh coolant (correct type and concentration for the application)
- Gloves and safety glasses
- New hose clamps
For heavy equipment, confirm the part number matches OEM specifications. Universal hoses frequently fail to account for specific routing clearances or pressure ratings, and that mismatch may not surface until the system is back under load.
Step 3: Drain the Coolant
- Place a catch pan beneath the radiator drain plug
- Open the drain plug or loosen the lower hose clamp to let coolant flow out
- Dispose of coolant properly — per EPA guidance, used antifreeze is not automatically a federal hazardous waste, but it can become regulated if contaminated. Never pour it into a drain, ditch, or soil. Recycle it through an approved facility.
Step 4: Remove the Damaged Hose
- Loosen clamps at both ends using clamp pliers or a screwdriver
- If the hose has bonded to the fitting, twist gently while pulling — use a hose pick or blunt tool to break the seal without damaging the metal fitting
- Inspect fittings after removal. Corrosion, cracks, or scale deposits mean the new hose will leak regardless of how well it's installed. Address the fitting first.
Step 5: Install the Replacement Hose
- Slide new clamps onto the replacement hose before positioning it
- Route the hose exactly as the original — away from belts, fans, and hot exhaust surfaces
- Seat the hose fully over both fittings, then position clamps roughly 1/4 inch from each end
- Tighten clamps firmly but not excessively. Overtightening cuts into the hose material and creates a new failure point. Gates specifically recommends replacing clamps with every new hose installation, as old clamps may be corroded or have lost clamping force.
Step 6: Refill Coolant and Test
- Refill with the correct coolant type and concentration per the vehicle or equipment manual. John Deere specifies 40–60% concentrate for diesel engines with wet-sleeve liners; Cat ELC comes as a 50/50 premix — follow the applicable manual, not a universal ratio.
- Start the engine with the radiator cap off to purge air bubbles, then top off and cap once flow stabilizes
- Run to operating temperature and inspect all clamp areas for drips
- Monitor the temperature gauge for the first 15–20 minutes
- Recheck coolant level after the first full heat cycle
Emergency Temporary Fix vs. Permanent Repair
If a hose fails in the field, a temporary patch can prevent total engine loss long enough to reach a shop. Common emergency methods include:
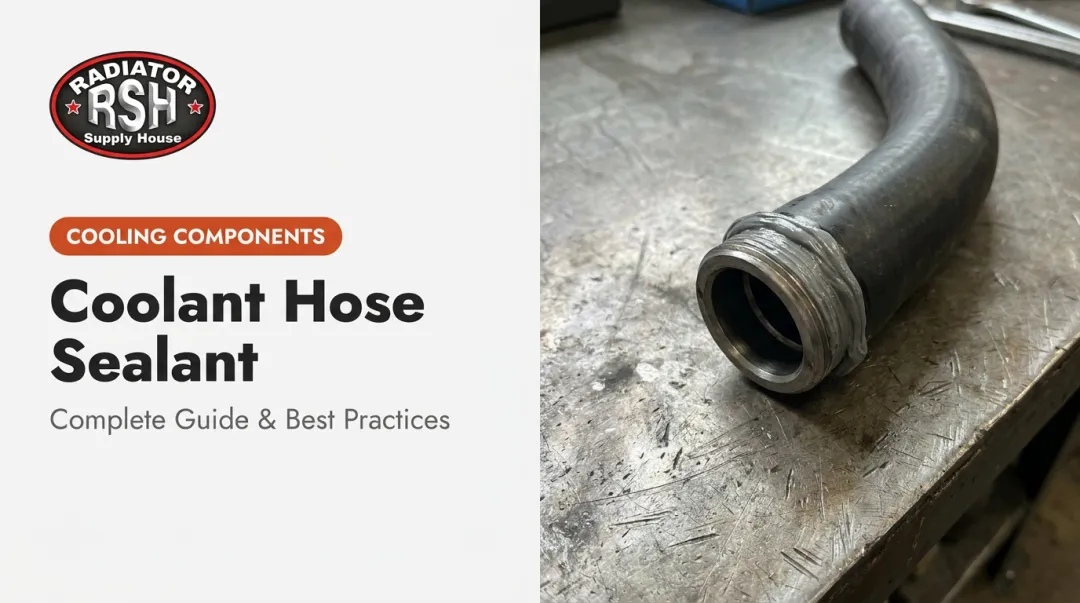
- Hose repair tape wrapped around the damaged section (after the hose is fully cooled and dried)
- Purpose-made hose repair kits with sleeve couplers
- Epoxy on small pinholes as a last resort
Repair tape degrades rapidly under heat and pressure. No manufacturer publishes a guaranteed operating duration for field tape repairs — the outcome depends on temperature, pressure, the product used, and how well the surface was prepared. Treat any tape repair as good for low-speed, short-distance travel only.
Stocking a Spare for Remote Operations
For equipment running in remote environments, a temporary fix may be all that stands between a quick recovery and stranded machinery. Standard practice for mining sites, agricultural operations, and remote construction projects includes carrying:
- A hose repair kit with sleeve couplers
- The correct replacement hose for the primary cooling circuit
- Hose clamps and coolant to top off after repair
The cost of a spare hose is trivial against the cost of stranded equipment — or a blown engine.
Temporary repairs buy time. A permanent hose replacement is always the correct end goal.
When to Repair vs. Replace a Coolant Hose
The decision comes down to cost, safety, and long-term reliability. A patch may feel cheaper in the moment, but a second failure risks engine damage that costs far more than any hose.
| Situation | Correct Action |
|---|---|
| Hose is sound, coolant seeping from a loose clamp | Retighten or replace the clamp only |
| Hose shows cracking, swelling, hardening, or softness | Replace the hose |
| Hose has already been patched once | Replace the hose |
| Hose has reached or exceeded manufacturer's service interval | Replace the hose |
| Failed hose shows ECD signs, or coolant is discolored | Replace hose and inspect the full system |
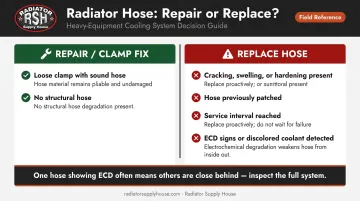
That last scenario deserves attention. One hose showing electrochemical degradation in an aging system often means other hoses are close behind. Inspect the radiator, remaining hoses, and clamps at the same time — a complete system check during planned downtime costs far less than an unplanned breakdown mid-operation.
Once you know what needs replacing, getting the correct fit and pressure rating the first time prevents repeat failures. Radiator Supply House carries cooling system hoses and components for 300+ manufacturers, including Caterpillar, Komatsu, John Deere, Freightliner, Kenworth, Peterbilt, and Volvo. ICEBOX replacement parts are OEM-equivalent and match original part numbers, so sourcing the right hose for your specific machine is straightforward.
Common Mistakes to Avoid and Preventive Maintenance Tips
Mistakes That Cause Repeat Failures
- Reusing corroded or stretched clamps — old clamps may look fine but have lost clamping force
- Installing a universal hose that doesn't match the original routing or diameter
- Working on a hot or pressurized system without waiting for full cooldown
- Skipping a post-repair leak test before returning the vehicle or equipment to service
- Ignoring the fittings — a corroded fitting will leak around any new hose
Preventive Inspection Schedule
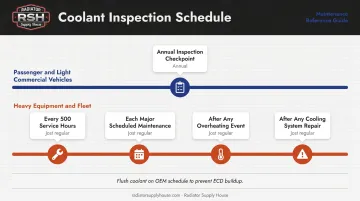
- Inspect all coolant hoses at least once per year for passenger and light commercial vehicles
- For heavy equipment, inspect every 500 service hours or at each major scheduled maintenance interval
- After any overheating event or cooling system repair, inspect hoses immediately — thermal stress accelerates degradation
- Flush and replace coolant on the OEM-specified schedule to prevent the electrochemical buildup that attacks hose material from inside
Fleet and Equipment Management
Those inspection intervals only hold value if they're tracked. For fleet operators and maintenance teams, log hose replacement dates alongside other service records so patterns and overdue intervals don't slip through. Many experienced fleet managers replace coolant hoses at major service intervals rather than waiting for failure. A hose costs a fraction of what a warped cylinder head or blown gasket does — and far less than an idle crew waiting on emergency parts delivery at a remote job site.
Frequently Asked Questions
Can coolant hoses be repaired?
Minor issues like a loose clamp can be fixed without replacing the hose. However, most physical damage — cracking, swelling, or softness — requires full replacement to ensure a reliable, leak-free seal. Patching buys time to reach a repair facility; it is not a permanent fix.
How much does it cost to fix a coolant hose?
For heavy equipment and commercial trucks, hose replacement costs vary significantly by machine model, hose routing complexity, and labor rates at the shop. RepairPal estimates radiator hose replacement at $496–$555 for passenger vehicles as a general benchmark — heavy-duty applications typically run higher. Contact your parts supplier for application-specific pricing.
Can I drive with a burst coolant hose?
No. An engine can overheat within minutes of losing coolant, risking permanent damage to the head gasket, cylinder head, or engine block. Pull over immediately, let the engine cool completely, and perform a temporary fix only to reach the nearest repair facility.
How do I know if my coolant hose needs replacing?
Watch for these warning signs during inspection:
- Visible cracking, surface weathering, or hardening
- Hose feels unusually soft or spongy when squeezed cold
- Swelling, bulging, or collapsed sections
- Coolant smell or puddles under the equipment
- Repeated overheating with no other identifiable cause
How long do coolant hoses typically last?
Gates recommends replacing heavy-duty coolant hoses every four years as a baseline interval. In diesel and high-heat environments, degradation can accelerate due to electrochemical degradation (ECD) and sustained operating temperatures — so inspect more frequently and replace proactively rather than waiting for failure.
How often should coolant hoses be inspected on heavy equipment?
Every 500 service hours or at each major scheduled maintenance interval, whichever comes first. Also inspect after any overheating event or cooling system repair — these stress the hose material and can accelerate failure that wasn't visible before.