Introduction
Most heavy-duty commercial trucks and equipment running an Allison or comparable automatic transmission route fluid through a cooler built into the radiator tank before it returns to the transmission. It's an efficient use of an existing heat exchanger — but only if the lines are connected correctly. Get it wrong, and both systems suffer.
Three specific mistakes cause most of the damage:
- Reversed lines reduce cooling efficiency and can accelerate wear on clutch packs
- Wrong fittings fail under pressure — Allison's documentation puts converter-out line pressure at 40–80 psi under load, enough to blow an unsecured hose off a smooth nipple
- Skipping the post-installation fluid check can let transmission temperatures spike high enough to damage clutch packs before the problem is caught
This guide covers the tools and fittings to have on hand, how to identify and connect feed and return lines correctly, the most common mistakes, and when a standalone external cooler makes more sense than relying on the radiator cooler alone.
Key Takeaways
- The radiator's built-in cooler has a dedicated inlet and outlet — wrong ports means reversed flow and reduced cooling efficiency
- Use only pressure-rated fittings with proper clamps; unsecured lines can fail under 40–80 psi operating pressure
- Install auxiliary coolers on the return side (after the radiator cooler), not the feed side
- Fluid level must be checked and topped up before the first start after reconnection
- High-demand applications like towing, hauling, or high-cycle work often require a standalone external cooler
What You Need Before Connecting Transmission Cooler Lines
Doing the research before touching anything prevents most installation mistakes. Confirm the port size, line diameter, and connection type for your specific make, model, and year before purchasing any parts.
Equipment and Tools Required
- Line wrenches (flare-nut wrenches) in the correct sizes — open-end wrenches strip soft aluminum fittings
- Drain pan positioned under the cooler ports before any line is loosened
- Rubber-tipped or hose clamp pliers for spring-clamp removal
- Teflon tape or ATF-compatible thread sealant — Parker's guidance warns PTFE tape can contaminate a system if improperly applied. Loctite 567 suits tapered metal pipe threads only — not flare seats or O-ring joints
- Flashlight or inspection mirror for routing checks in tight engine bays
- Service manual or OEM diagram for the specific application — this is the only reliable source for port identification and torque specs
Fittings and Line Materials
Two fitting types are most common at the radiator connection:
- Inverted flare fittings (SAE J512): Standard on OEM steel lines in most domestic applications; 45-degree flare geometry — not interchangeable with 37-degree hydraulic flare fittings (SAE J514)
- Barbed hose fittings: Used when rubber or braided hose sections are added; must be paired with the correct worm-gear clamp for the hose diameter and pressure rating
One important note on clamp torque: Ideal-Tridon's catalog lists installation torques ranging from 10 lbf-in for narrow Micro-Gear clamps up to 100 lbf-in for heavy-duty SmartSeal HD series. Always identify the clamp series before assigning a torque value, as values vary fivefold across product lines.
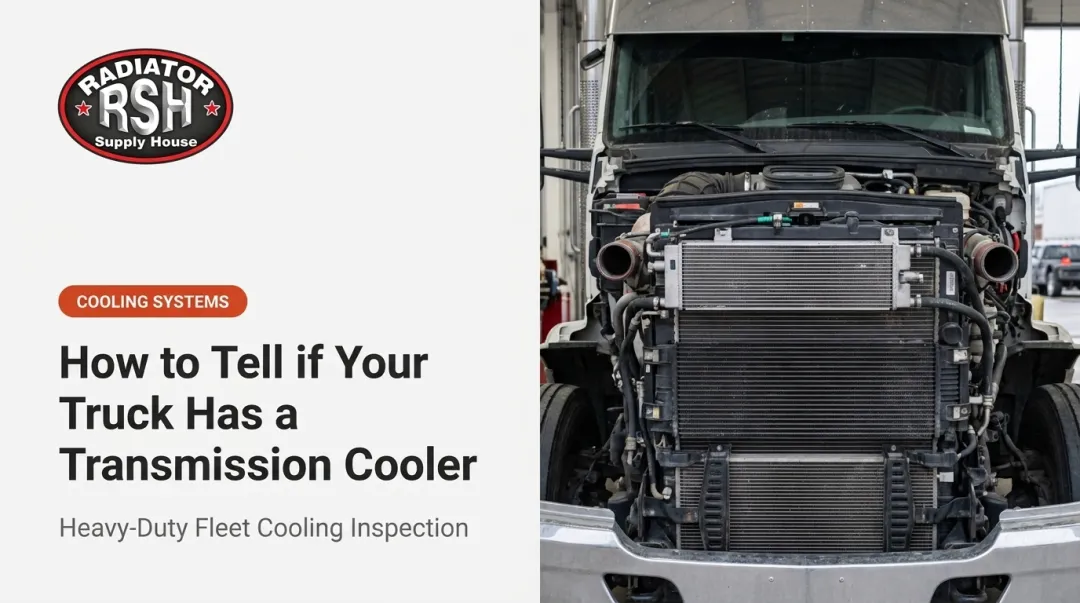
If the radiator's built-in cooler tank is corroded, cracked, or leaking, replace the radiator before reconnecting lines. Radiator Supply House stocks OEM-equivalent radiators with integrated oil coolers for Freightliner, Caterpillar, Mack, and other heavy equipment platforms — including the Freightliner Columbia/M2 (SKU #601083) and Caterpillar D4H (SKU #850917).
Fluid and Safety Readiness
Before starting work:
- Confirm the correct ATF type for your transmission (varies significantly by OEM)
- Verify the engine and transmission are fully cool
- Have clean rags on hand to catch residual fluid from disconnected lines
- Look up the torque specification for your cooler line fittings — never apply Allison transmission-port torques (25–60 lbf-ft) to aluminum radiator ports. These are different joint types with different torque requirements
How to Connect Transmission Cooler Lines to the Radiator
Step 1: Identify the Feed Line and the Return Line
The feed line carries hot fluid from the transmission to the radiator cooler. The return line carries cooled fluid back to the transmission.
On Allison transmissions, ports are labeled "TO COOLER" and "FROM COOLER" directly on the transmission case — use those labels, not upper/lower radiator position. A few specifics worth knowing:
- Allison 3000/4000 family transmissions have front and rear port variants — consult your model's documentation
- Freightliner M2 trucks use OEM quick-connect fittings rather than threaded ports
- Port position alone is not a reliable indicator on any platform
If lines are unlabeled on an older or custom setup, trace each line physically back to the transmission and identify it at the source. Once both lines are confirmed, you're ready to disconnect safely.
Step 2: Drain and Disconnect Old Lines
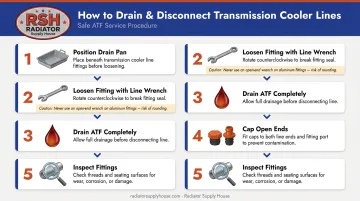
- Position the drain pan directly under both cooler ports
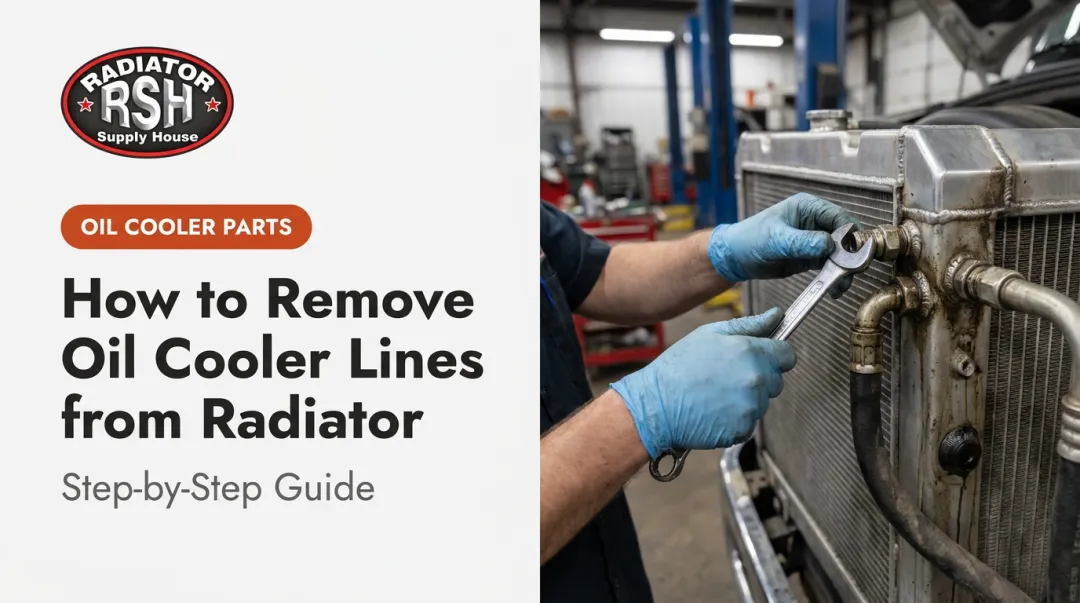
- Loosen each fitting with a line wrench (counterclockwise) — never use an open-end wrench on soft aluminum
- Allow residual ATF to drain completely before pulling the line
- Cap open ends immediately to prevent contamination
- Inspect removed fittings for corrosion, thread damage, or cracking — damaged fittings get replaced, not reused
Step 3: Connect Lines to the Correct Radiator Ports
For threaded fittings:
- Apply a thin layer of ATF-compatible thread sealant to male threads only if the joint type calls for it — do not apply sealant to flare seats, O-ring faces, or quick-connect ends
- Thread the feed line to the cooler inlet port and the return line to the outlet port
- Tighten finger-tight first, then use a line wrench — aluminum radiator threads strip easily. Check the service manual torque spec for your specific port size before final tightening; hand-tight plus a partial turn is a starting reference only
For barbed hose fittings:
- Push the hose fully onto the barb until it seats against the shoulder
- Position a worm-gear clamp just behind the barb (not on the hose mid-run)
- Tighten to the clamp manufacturer's specified torque for that clamp series
- Confirm no twisting or kinking in the routed line
Step 4: Check Fluid Level, Start the Engine, and Inspect for Leaks
- Top up the transmission fluid to the correct level before starting — fluid lost during disconnection must be replaced
- Start the engine and shift through all gear positions while watching cooler line connections for seeps or drips
- After a 5-minute idle, recheck fluid level and inspect all fittings again
- Any seepage after the idle check means re-torquing the fitting or replacing it — don't run the system with an active drip
Common Mistakes When Connecting Transmission Cooler Lines
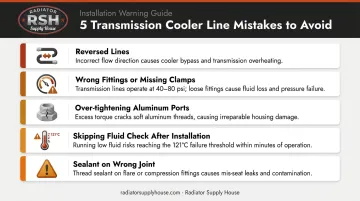
Most connection failures come down to five repeatable errors. Each one is avoidable — but left unchecked, any of them can cause transmission overheating, fluid loss, or a damaged radiator that's expensive to replace.
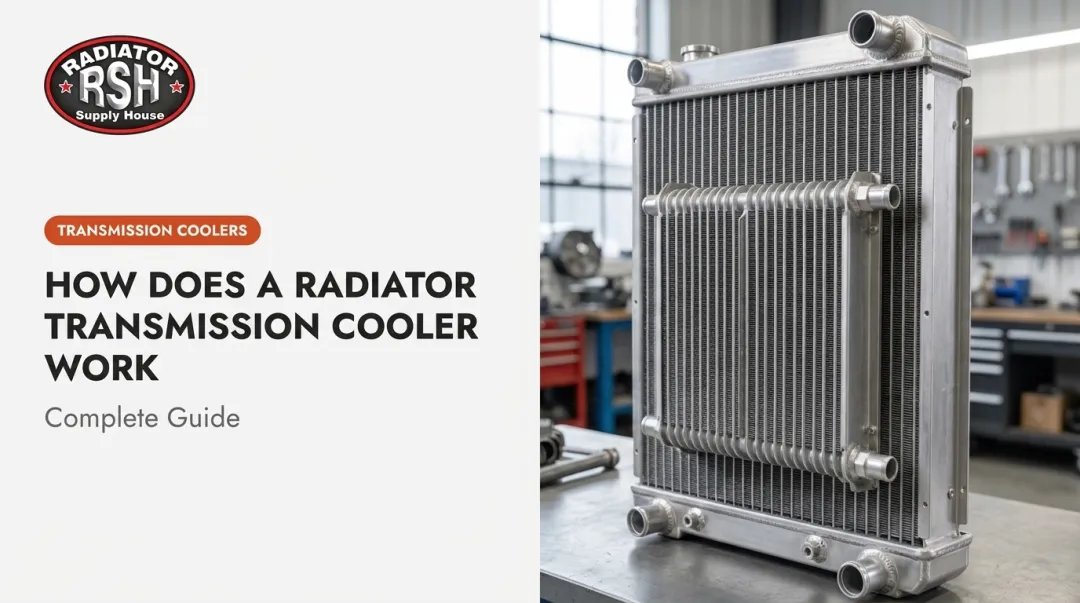
Reversed lines cut cooler efficiency. Fluid flowing opposite to the cooler's designed direction reduces heat exchange performance. In radiators with integrated cooler tanks, the internal baffle and flow path are engineered for a specific entry direction — running it backwards isn't neutral, it's actively worse.
Wrong fittings or missing clamps risk blowoff under load. ATF lines operate at 40–80 psi converter-out pressure. A rubber hose pushed onto a smooth metal nipple without a proper barbed adapter and clamp can separate completely, draining the transmission in minutes.
Over-tightening or cross-threading destroys aluminum ports. Aluminum threads are soft. The correct practice is finger-tight plus a controlled turn with a line wrench to the spec in the service manual. Over-tightening cracks the port boss; cross-threading destroys it. Both outcomes mean replacing the radiator tank.
Skipping the post-connection fluid check causes overheating. Even a small ATF loss during disconnection must be replaced before starting the vehicle. Allison's operating limits flag sump temperatures above 121°C (250°F) as overheating — and running low on fluid is one of the fastest ways to get there.
Sealant on the wrong joint type prevents a proper seal. PTFE tape belongs on tapered pipe threads only — not on flare seats or O-ring faces. Using it in the wrong location causes contamination or an incomplete seal that leaks under pressure.
Troubleshooting Common Issues After Connecting Cooler Lines
Even careful installations can surface problems at first start-up. The three most common issues:
Fluid Leak at the Radiator Port Fitting
Likely causes:
- Under-tightened fitting
- Missing or incorrectly applied thread sealant
- Cracked or damaged fitting thread
What to check: With the engine off, wipe the area completely dry. Retorque the fitting to the spec for your port size, then restart.
If the leak persists:
- Remove the fitting entirely
- Inspect both thread sets (fitting and port)
- Replace any damaged hardware and re-seal before reinstalling
Do not try to stop a leak by over-tightening.
Transmission Overheating After Reconnection
Likely causes:
- Feed and return lines connected in reverse
- Kinked or tightly bent line restricting flow
- Cooler capacity insufficient for the load
What to check: Start by verifying line direction against the service manual — reversed connections are the most common culprit. Then inspect the full line route for kinks or tight bends. If direction and routing are correct and temperatures are still climbing, the factory radiator cooler may be undersized for the application. See the next section.
Delayed Gear Engagement or Slipping After Reconnection
Likely causes: Low fluid level from ATF lost during disconnection that wasn't fully replenished.
What to check: Check fluid level immediately with the engine warm and idling in Park. Add the correct ATF type incrementally until the dipstick reads correctly. Do not overfill — both low and excessive fluid levels cause transmission problems.
When to Skip the Radiator and Use a Standalone Transmission Cooler
The factory radiator cooler handles normal passenger and light-commercial use well. Under sustained high-load conditions — towing at or near GVW, hauling, high-cycle stop-and-go work — it often isn't enough.
Signs the radiator cooler is undersized for the application:
- Recurring overtemperature codes or warning lights
- ATF discoloration (dark brown or burnt smell indicates heat degradation)
- Transmission fluid temperatures consistently above Allison's normal sump range of 71–93°C (160–200°F)
- Fluid reaching or exceeding 149°C (300°F) at the cooler feed line — Allison's documented overtemperature threshold for fluid-to-cooler temperature
A standalone external cooler is plumbed in series on the return line after the radiator cooler, giving fluid a second cooling pass before it re-enters the transmission. For applications where maximum cooling is the priority — or where the radiator cooler is bypassed entirely — the external cooler handles the full load independently.
Radiator cooler vs. standalone — the key trade-off:
| Radiator-Integrated Cooler | Standalone External Cooler | |
|---|---|---|
| Cold-start warm-up | ✓ Engine coolant warms ATF, protects seals | ✗ No warm-up assist |
| Peak thermal performance | Limited by coolant temperature | Higher — independent of engine temp |
| Best for | Normal duty cycles | High-demand, sustained load applications |
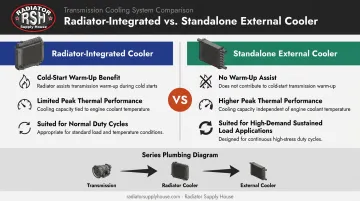
Many high-demand setups run both in series to get warm-up protection in cold climates and maximum cooling under load.
Once you've determined a standalone cooler is the right call, sourcing the correct unit for your equipment is the next step. Radiator Supply House stocks standalone transmission and hydraulic oil coolers for heavy equipment and commercial trucks — including units for Caterpillar (Cat 980C, D6H, D6K2), Komatsu D275, Case 621/721 wheel loaders, Peterbilt with Allison Transmission systems, and Freightliner.
Frequently Asked Questions
What happens if you connect transmission cooler lines to the radiator backwards?
Reversing the lines means fluid enters the radiator cooler from the wrong direction, reducing cooling efficiency. In integrated radiator coolers, the internal flow path is designed for a specific entry point — reversed flow disrupts heat exchange. The fix is straightforward: swap the two lines back to their correct ports.
Which transmission cooler line is the inlet and which is the outlet on the radiator?
The inlet receives hot fluid from the transmission (feed line); the outlet returns cooled fluid back to it. On Allison transmissions, the ports are labeled "TO COOLER" and "FROM COOLER" directly on the transmission case — always use those labels over positional assumptions. When in doubt, your OEM service manual is the definitive reference.
Do I need to flush the transmission after reconnecting cooler lines?
Not always. If the lines were disconnected cleanly with capped ends, cycle through all gear positions and recheck the fluid level — that's the minimum. A flush is warranted when contamination (dirt, water, or coolant) entered the lines, or when degraded fluid was found during the disconnect.
What size fittings do transmission cooler lines use?
Heavy equipment and commercial trucks vary significantly by manufacturer. Allison 3000/4000 series transmissions use #12, #16, and #20 SAE fitting designations; other OEMs differ. Always measure the existing line diameter and confirm the fitting style against the OEM parts specification before ordering replacements.
Can I connect transmission cooler lines without routing through the radiator?
Yes. A standalone external cooler can replace or supplement the radiator cooler by routing lines directly to the external unit. This is common in high-load applications such as construction and mining equipment. Size the cooler appropriately for the transmission's fluid volume and the duty cycle.
How do I know if my transmission cooler lines are leaking at the radiator?
Look for reddish fluid drips or staining under the front of the vehicle near the radiator, a sweet or burnt smell at idle, or unexplained low fluid level on the dipstick. Confirm by wiping the fittings completely dry, running the engine for a few minutes, then reinspecting for wet spots at the connection points.