For heavy equipment operators and commercial fleet managers, that kind of unplanned downtime is far more expensive than the hose itself. The good news: most coolant hoses don't fail without warning. They show signs — and catching those signs early is what separates a quick swap from a blown head gasket.
This guide walks through every warning sign to watch for, a step-by-step inspection method, and how to decide whether a hose needs replacement now or can be monitored until the next scheduled service.
Key Takeaways
- Visible cracking, swelling, collapse, or blistering are early physical warnings of a hose nearing failure
- A healthy hose feels firm but pliable; spongy or rock-hard texture signals end-of-life
- Active coolant leaks, engine overheating, or steam from under the hood require immediate shutdown
- Always inspect on a cold engine — heat temporarily softens rubber and masks deterioration
- OEM manuals (Cat, Deere, Freightliner, Peterbilt, Kenworth) specify condition-based replacement, not a fixed mileage interval
What You Need to Inspect a Coolant Hose
A coolant hose inspection takes less than 10 minutes. The critical requirement is doing it under the right conditions: a rushed check on a hot engine can mislead your diagnosis and cause serious burns.
Tools Required
- Heat-resistant work gloves — essential for both cold inspections and post-warmup checks
- Flashlight or inspection light — for full-length hose visibility
- Small mirror — to see hoses running behind components or against the firewall
- Clean rag — wipe surface grime before inspecting for cracks or residue
Setup and Preconditions
The engine must be fully cold before you touch any hose. Cooling systems operate under pressure. A Freightliner Cascadia maintenance manual warns that loosening the surge-tank cap before the system has completely cooled can discharge scalding coolant. Peterbilt's manual adds that an engine operated within the preceding 30 minutes should be treated as hot — treat it as hot.
Follow these steps before starting:
- Park on a level surface with the engine off
- Wait until the engine is fully cooled (typically 2+ hours after shutdown)
- Open the hood and position your light source before you begin
- For leak and steam checks under pressure, start the engine after the cold inspection and observe from a safe distance
Signs & Symptoms of a Failing Coolant Hose
Symptoms fall into two categories: physical deterioration you find on the hose itself, and system behavior like overheating or leaks. Ideally, you catch physical signs before the system starts showing behavioral symptoms — by that point, the hose condition is often already critical.
Visible Surface Damage: Cracks, Blistering, and Swelling
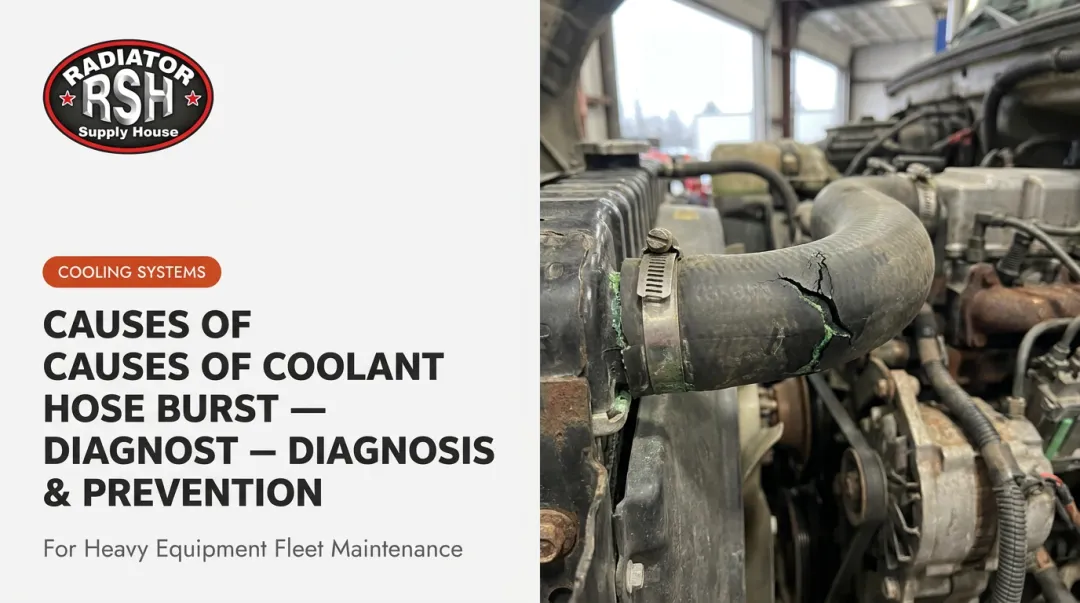
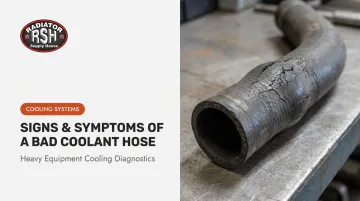
External cracking is one of the earliest visible signs of heat and age degradation. Surface cracks that look cosmetic can expand rapidly under system pressure, especially in heavy-duty applications where advanced-emissions engines run higher under-hood temperatures.
Blistering or bulging is more urgent. A bulge on the hose body means the inner reinforcement layer has weakened and a blowout is imminent. Neither condition warrants monitoring — both require immediate replacement.
What to look for:
- Longitudinal or circumferential surface cracks
- Bubbles or raised areas on the hose surface
- Discoloration or uneven texture along the hose length
- Worn or abraded sections where the hose contacts other components
Texture Changes: Spongy or Rock-Hard Hose
A healthy hose has a specific feel — firm resistance under a squeeze, but with some give. Any deviation from that signals internal breakdown.
- Spongy or mushy: The rubber has deteriorated internally. The hose compresses too easily and won't return to shape properly. This is end-of-life.
- Brittle or rock-hard: The hose has lost elasticity from heat cycling or fluid contamination. It won't flex under vibration or pressure surges — it will crack instead.
Both extremes indicate the hose is no longer serviceable. SAE J1684 identifies electrochemical degradation (ECD) as a major cause of EPDM hose failure — it attacks the hose internally, meaning the outside can look acceptable while the inside has already broken down. Tactile inspection near the hose ends is the only way to catch this.
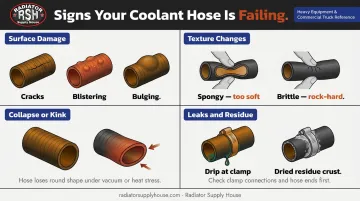
Collapsed or Kinked Hose
A collapsed hose has caved inward, losing its round profile. It can't flow coolant effectively, creating a restriction that causes overheating even if there's no visible leak.
The Freightliner Cascadia maintenance manual identifies one common mechanism: the pressure cap's vacuum-relief valve prevents hose collapse as the system cools. When that valve fails or the cap is wrong, hoses get sucked inward. Other causes include worn-out internal spring inserts and rubber softening over time.
A kinked hose creates the same flow restriction. It's typically caused by improper routing or installation — Peterbilt's maintenance documentation specifically requires technicians to inspect for and correct kinks before returning equipment to service.
Coolant Leaks and Residue at Connections
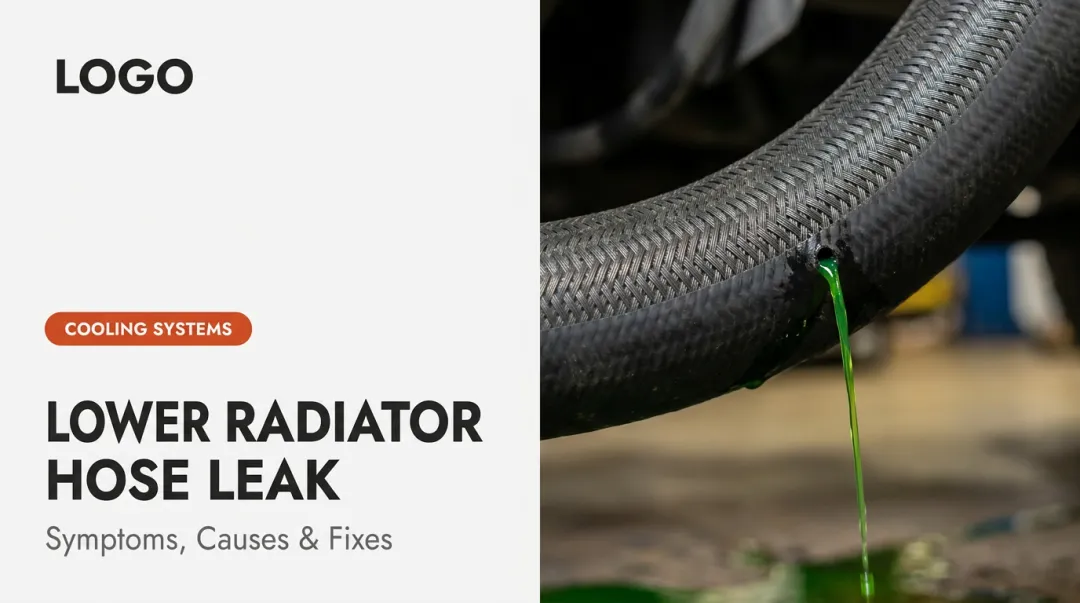
Leaks don't always drip — often the first sign is dried residue around clamps and connection points.
Look for:
- Wet spots or active dripping near hose ends
- White or greenish dried crust around clamps
- Staining or discoloration on the hose exterior near connections
- A sweet smell — antifreeze has a distinctive odor that's often detectable before a visible leak appears
Leaks can occur at the hose body (from cracks) or at the ends (from loose clamps or hose hardening that prevents a proper seal).
Engine Overheating or Temperature Gauge Spike
Once a compromised hose restricts coolant flow enough, the engine temperature gauge climbs — the first in-cab warning an operator notices. At that stage, continued operation risks serious engine damage.
Continued operation after the temperature gauge spikes risks:
- Head gasket failure
- Warped cylinder heads
- Engine block damage
Shut down and inspect before resuming operation.
Steam or White Smoke from Under the Hood
If the temperature gauge spiked and you kept running, steam is what comes next. It means coolant has already escaped and is vaporizing on hot engine or exhaust surfaces. Steam is not a warning sign — it means a hose has already failed or is leaking significantly. Pull over or shut down equipment immediately. Overheating damage sets in within minutes of visible steam appearing.
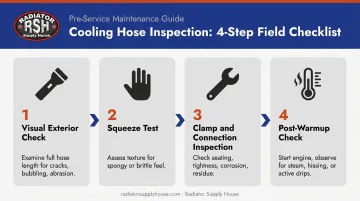
How to Inspect Your Coolant Hose Step by Step
A complete inspection combines visual, tactile, and operational checks. Done properly, it takes about 10 minutes — run it during scheduled maintenance intervals, after any overheating event, or any time you notice coolant smell or a low reservoir level.
Step 1 — Visual Exterior Check
With the engine cold, use a flashlight and mirror to examine the full length of each hose. Don't just check the visible section — run the light along the entire hose including areas tucked behind other components.
Look for: surface cracks, bubbling, discoloration, blistering, and abrasion wear where the hose contacts adjacent parts.
Step 2 — Squeeze Test for Texture
Wearing gloves, firmly grasp the hose at several points along its length and squeeze.
- Healthy: Firm resistance, slight give, springs back when released
- Spongy: Compresses too easily, doesn't return to shape — internal deterioration
- Brittle: Won't flex, feels like hard plastic, may audibly crunch — replace immediately
Pay extra attention near the ends and just behind each clamp. Electrochemical degradation (ECD) and heat damage tend to concentrate in those areas first.
Step 3 — Inspect Clamps and Connection Points
Loose clamps are a leading cause of end-leaks. Check that every clamp is:
- Seated correctly behind the connection flange (not riding up onto the hose bead)
- Tight with no visible rotation or looseness
- Free of corrosion or deformation
Look for dried coolant residue concentrated at the very end of the hose — that pattern points to a clamp issue, not a body crack. Residue or cracking along the hose length points to hose failure.
Step 4 — Post-Warmup Leak and Steam Check
After completing the cold inspection, start the engine and let it reach operating temperature. Observe from a safe distance.
Watch for:
- Steam rising from any hose or connection area
- Audible hissing (pressurized coolant escaping through a small gap)
- Active dripping that wasn't visible during the cold inspection
If you spot a leak only during this warm check, the hose or clamp is failing under system pressure. Don't top off the coolant and move on — that's a temporary fix that accelerates the damage.
How to Interpret What You Find
Normal / Acceptable
A hose in acceptable condition shows:
- No surface cracks, uniform color, firm but flexible texture
- No leaks or residue at connections
- Clamps tight and corrosion-free
Log the inspection date and schedule the next check per your equipment's OEM manual.
OEM inspection frequency varies by machine:
- Caterpillar C3.4B: Weekly hose and clamp inspection per the operation and maintenance manual
- Freightliner Cascadia: Monthly post-trip inspection of radiator and heater hoses per the driver's manual
- John Deere: Yearly checks with condition-based replacement
Always follow your specific machine's manual — there is no single universal interval across makes.
Minor Issues — Monitor and Schedule Replacement
These signs are borderline — don't ignore them, but they don't require pulling the machine out of service today:
- Small surface cracks limited to the outer jacket with no swelling underneath
- Slight softening without complete sponginess
- Minor residue at a clamp that tightens down correctly and shows no further seepage
Action: Mark the hose for replacement at the next scheduled service. Increase inspection frequency in the interim. Set a calendar reminder or tie it to the next scheduled service interval so it doesn't get overlooked.
Out-of-Spec — Replace Immediately
Any of these findings requires replacement before the next operation:
- Visible bulging, blistering, or collapse
- Hose is spongy, crumbling, or rock-hard and cracking
- Active coolant leakage anywhere along the hose or at connections
- Any symptom accompanied by engine overheating or visible steam
For heavy equipment and commercial fleets, Radiator Supply House stocks OEM-equivalent cooling system components for Caterpillar, Komatsu, John Deere, Freightliner, Kenworth, Peterbilt, and Volvo — covering construction, mining, agricultural, and on-highway truck applications. Contact their team at radiatorsupplyhouse.com to identify the right replacement part for your specific machine before the next run.
Common Mistakes When Inspecting Coolant Hoses
Inspecting on a hot engine. Heat temporarily softens rubber, making a deteriorated hose feel more pliable than it actually is — you'll miss brittleness and internal breakdown. There's also a burn hazard: pressurized hot coolant can spray if any connection is disturbed. Always let the engine cool completely before handling hoses.
Only checking the visible middle section. Most hose failures originate near the ends, behind clamps, or in sections routed behind other components — like the sections tucked behind a fan shroud or coolant reservoir bracket. Use a mirror and light to work through the full length, not just the easy-to-reach span.
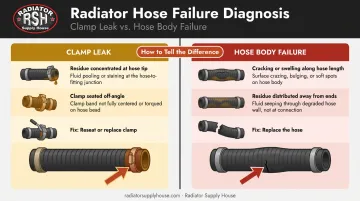
Misreading a clamp leak as hose failure (or vice versa). These two problems look similar but have different fixes:
- A clamp leak shows residue concentrated at the very tip of the connection, often with the clamp seated off-angle or running loose
- A hose body failure shows cracking, swelling, or residue along the hose length itself
Misidentifying the source leads either to replacing a good hose unnecessarily or retightening a clamp when the hose itself needs to go.
When a hose does need replacement, make sure the new part matches the original's diameter, length, and pressure rating — especially on heavy-duty equipment where cooling system tolerances are tight.
Frequently Asked Questions
How do I know if my coolant hose is bad?
Look for visible cracking, bulging, or blistering on the surface, and squeeze the hose to check for spongy or rock-hard texture. Coolant residue around clamps, engine overheating, or steam from under the hood are behavioral signs that indicate the hose is already compromised.
Can you drive with a blown coolant hose?
No. A blown hose causes rapid coolant loss and engine temperature spikes that can cause head gasket failure, warped cylinder heads, or complete engine seizure within minutes. Shut down immediately and source a replacement before operating again.
How expensive is it to fix a coolant hose?
For heavy equipment and commercial trucks, costs vary significantly by machine type, hose routing complexity, and shop labor rates. Get a model-specific quote from your dealer or repair shop rather than relying on a general estimate.
How often should coolant hoses be replaced?
There is no single universal interval — OEM guidance ranges from weekly inspection (Cat C3.4B) to annual condition-based checks (John Deere). Replace when your OEM's condition criteria are met, or sooner if any physical or behavioral warning signs appear.
What causes a coolant hose to fail prematurely?
The main causes are heat cycling from high under-hood temperatures, electrochemical degradation (ECD) from coolant chemistry attacking the rubber internally, oil or fluid contamination on the hose exterior, and physical abrasion from contact with adjacent components or improper routing.
What happens if a coolant hose bursts while driving?
A burst hose causes immediate coolant loss, a rapid rise in engine temperature, and often visible steam from the hood. Pull over or shut down equipment immediately — continuing to operate even briefly risks catastrophic engine damage.